Setup
After installation the plugin can be found under Vector -> Time Editor. You will need to select
the Vector Layer you want to edit (blue highlight). All functions of Time Editor will operate
on the highlighted layer. The first time the Time-Editor starts it will ask you for
the attribute field names for the primary key, the datestamp attributes, the documentation and
the common identifier. If you use the sample dataset fill in the fields as in the following
screenshot:
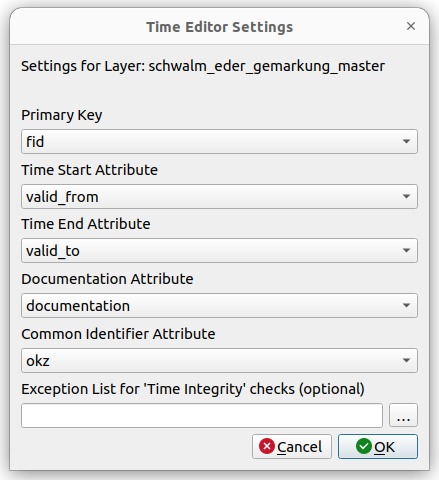
The last option can be ignored for now. It will become important, once we check for the temporal topology.
At the moment you will have to adhere to a YYYY-MM-DD date format. In the future we might
add support for different date options.
Use QGIS expressions to change from a different date format. An example can be found in the CShape Tutorial